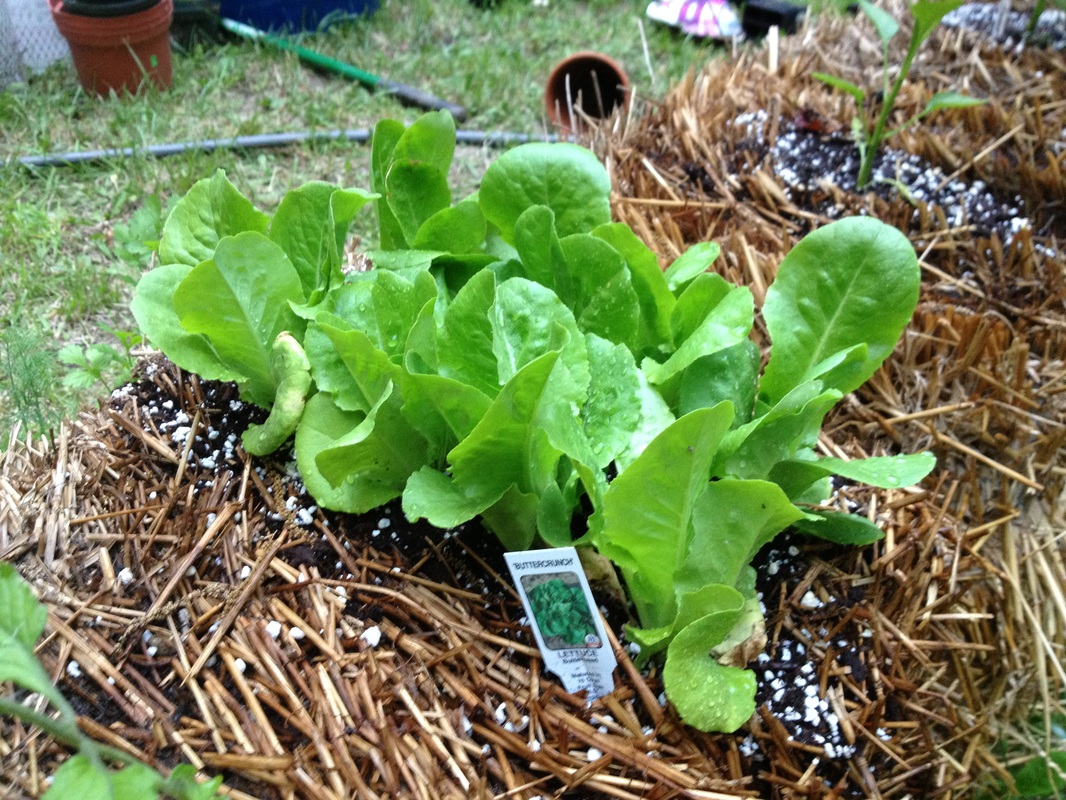
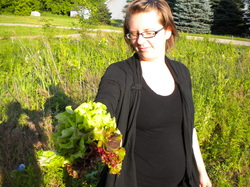
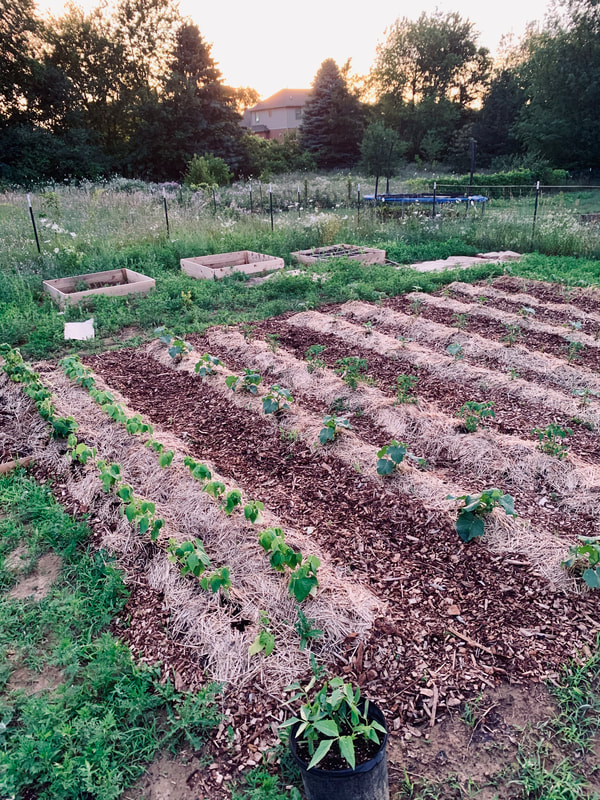
 Building Our Homestead, Recreating Our LivesThere is no question as to whether we're struggling and constantly trying to figure out how to life and keep our family safe. If you're new here, maybe you don't know but our daughter has Limb Girdle Muscular Dystrophy 2J and she's ventilator dependent. She requires 24/7 help and care. It is imperative that our family remains safe and healthy because Ellie is considered high risk. My career as a dietitian is morphing, adapting to a new normal. I have temporarily been ignoring much of my typical work as a dietitian and I've been focusing on my garden and our home. By building our homestead, we will be more self sufficient and hopefully more resilient during these uncertain times in a pandemic. I have been starting seeds, planting seedlings, and growing food for our family. I have been using Facebook Marketplace to connect with locals and sell the extras to bring in some money in hopes of being able to pay our bills. I have really enjoyed selling produce and garden goodies. It's been a wonderful way to connect with people while social distancing and masking up. Customers have been grateful for my efforts and knowledge. I've learned through this process that I actually know a lot more about growing food than I thought I did. People are arriving as customers and leaving as friends and it's such a great feeling. Instead of just selling a product, I can talk about getting kids excited to grow food and try new things. I've talked with a mom whose child seems to have sensory struggles that appear to just be picky eating. When I purchased my seeds, later than planned, I never thought I'd feel so fulfilled as a dietitian. The thought hadn't crossed my mind that by selling produce and plants that I would get to talk to so many people about food and nutrition struggles and needs. My heart is really full and I feel like I'm really helping people love fruits and veggies!!! This was supposed to be a post just to share some resources but in sitting down to gather things, I found myself making connections in my work and hobbies. Even during a pandemic, life can be good. My top 5 Go-To Garden Resources This Growing Season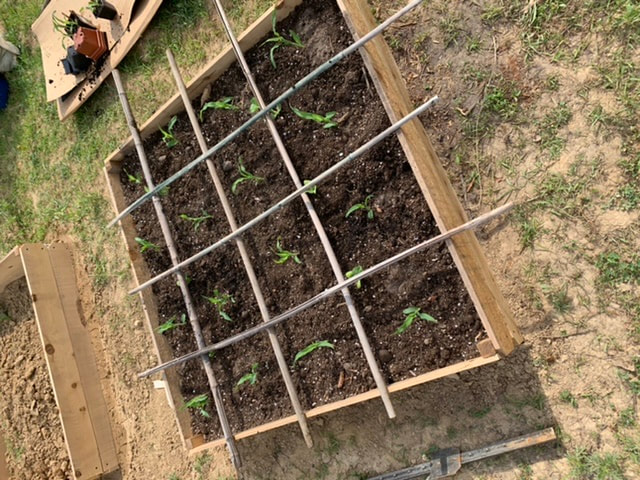 1. Luke at MI Gardner is really knowledgable and he's local so his growing experience will apply here since I think we're in the same growing zone. 2. Iowa State University, University Extension has some really awesome guides for planting. I've been relying heavily on their Planting and Harvesting Times for Garden Vegetables guide. 3. Plant and Plate has an awesome cheat sheet for square foot gardening. This document has saved me an insane amount of time. Honestly, with how much research and time it's saved, it's worth way more than $3.99 (I am not paid to say this, I'm just a fan). 4. If you need a little more ideas and inspiration, the Plant-A-Gram printables from Williams-Sonoma Agrarian are pretty and helpful, pretty helpful. 5. The Vegetable Garden website is nicely setup and easy to navigate. You can plug in your zipcode and figure out what an ideal planting/harvesting schedule is for your growing zone. To those who have been here to purchase garden goods from me, thank you. I really appreciate your kindness and allowing me to share all the things with you that make me happy.
Enjoy your garden! Reach out if you have questions. Comment below on whether you also love these resources or if you have other awesome resources to share! Happy planting!
0 Comments
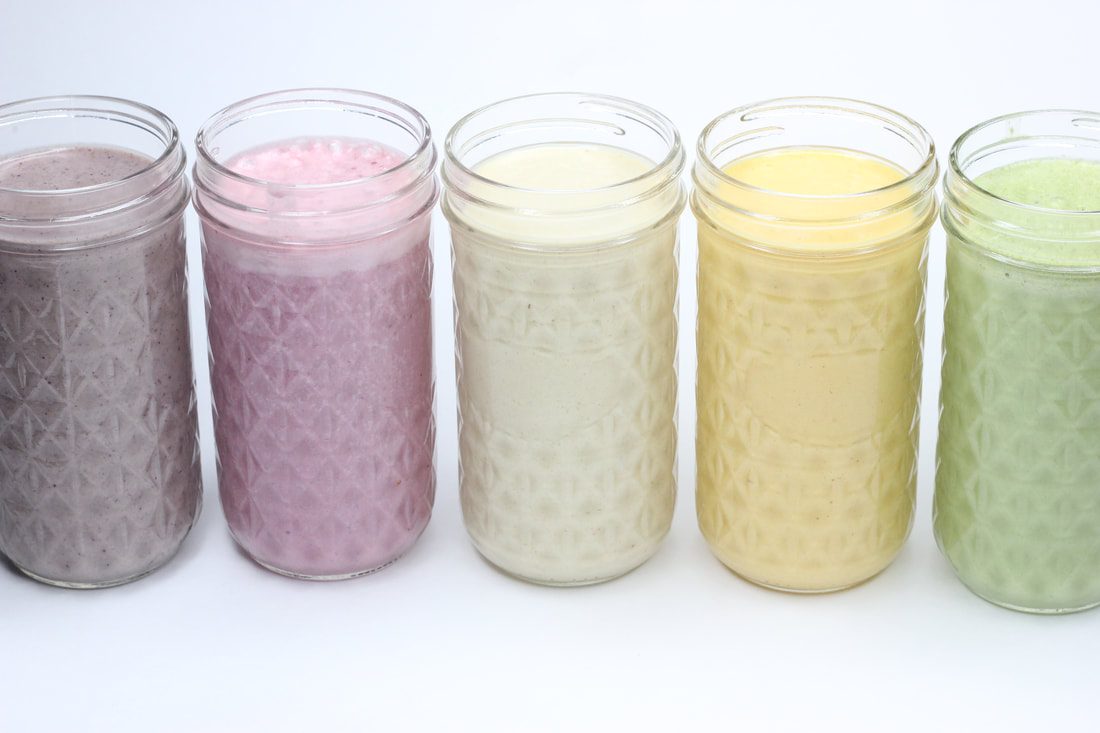
We have always found it easier to cook up meals for Ellie in big batches, then store everything in the fridge and/or freezer. But once everything is blended what's the best solution? Here are are favorite things, we hope you find it helpful. If you have ideas and hacks for storing your blended meals we haven't shared, drop them in the comments - We'd love to hear your ideas! 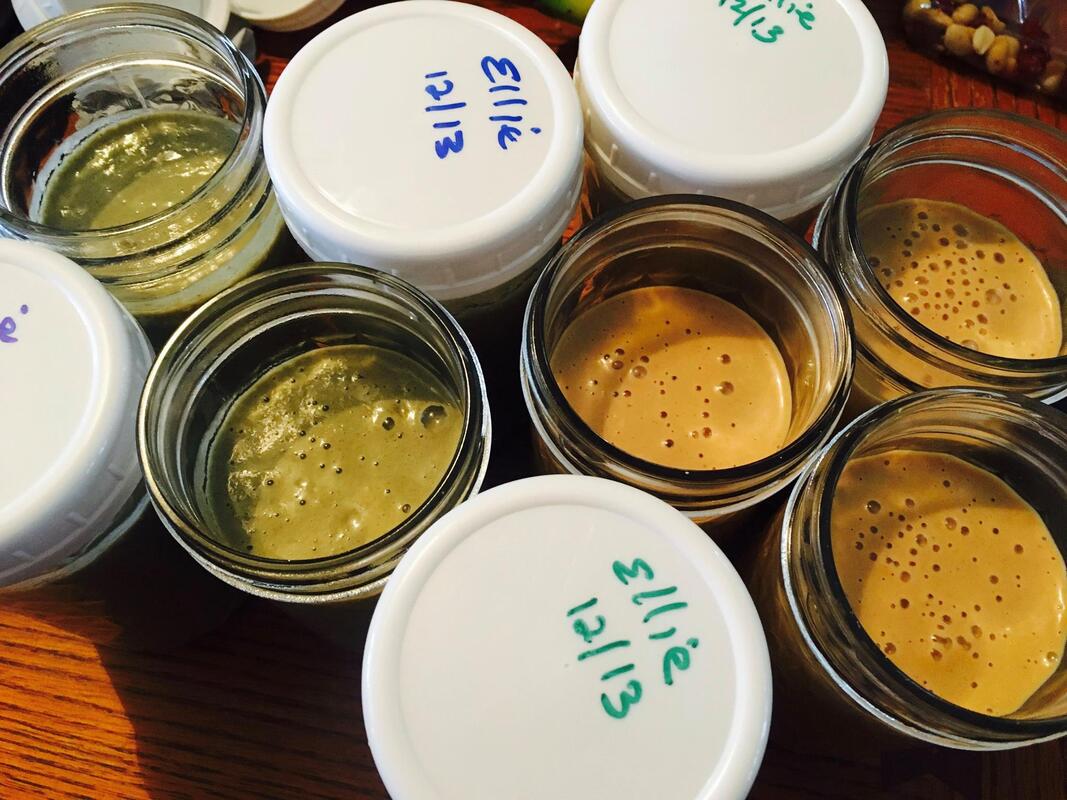 Mason Jars
We love using wide mouth, straight sided, quilted canning jars. They are perfect for portioning Ellie's meals. She eats 4 jars full everyday. Her meals are typically about 1 calorie per 1 ml of food. Measuring meal portions with mason jars is easy if you know how much your jar holds. The glass jars fit well in fridge and freezer bins for simple organization. They're freezer/dishwasher/microwave safe and, are easy to clean. Plastic Lids We love plastic canning jar lids because they are 1 piece, don't rust, easy to clean (dishwasher safe), and provide a reusable canvas for food labeling. Chalk Markers: These chalk pens stand up well to use in pantry, freezer, fridge but still wash off easily for continued use. We have a drawer style freezer in the kitchen so it's easy to see the labeling on our plastic lids. We also have a stand up freezer with storage containers, it's easy to pull out the container and scan the lids for Ellie's next meal. Freezer & Freezer Organizing Bins: mDesign 16" bins are the perfect size to line up 5 of Ellie's jars. We use these in our standup deep freezer and our refrigerator's freezer drawer. It's important to keep blends labeled, separated, and organized. We found out the hard way once when we stored leftover (really super delicious) turkey gravy in the freezer in one of the same jars with lids we juse for Ellie's food. It was labeled "Turkey Gravy" but somehow the label was overlooked and a caregiver on night shift fed Ellie an entire jar of turkey gravy. She got sick and had tummy trouble for a couple days. Lesson learned: it's better to be overly organized and label EVERYTHING than to cross your fingers and hope you've got the right food! Baskets: A plastic basket that is easy to clean and allows air flow makes very functional pantry or supply closet storage. It works well for us to store clean lids and other tube feeding supplies like syringes and extensions. Rotating your stocked blends: We use a first in first out method of rotating our blends to make sure they are always safe. Food safety is top priority! We keep 5 meals in the refrigerator at a time. This gives them enough time to safely thaw in the refrigerator. Everytime we use a jar of blends from the refrigerator, we pull a frozen meal from the freezer and place it at the back of the bin. Please always use safe food handling practices and proper hygiene while preparing food for anyone, including Tubies. That's it. We hope this helps you get organized and gain confidence while you meal prep! Happy Blending! This post contains affiliate links.  Another pancake recipe? I know, right?!?I don't know why it's the baked goods that seem to always make it to the blog. Maybe it's because it's something we make when we aren't hurried? I don't know. These pancakes came about due to necessity. COVID19 has really changed how we do things it seems. Bread has been scarse. I've always wanted to make my own sourdough starter but until now, I didn't have the motivation to make it happen. In an effort to save money, make fewer trips to get groceries, and for enjoyment, I finally made my own sourdough starter from scratch. It's so easy. It's really been an exciting experience for me. Did you know that many people throw away half of their starter for days in a row while they establish a good starter? I hate waste. I especially hate waste when resources are hard to come by. Stores have been wiped of flour and bread. I suppose everyone else had the same idea of making bread. While scrounging for recipes that use discarded sourdough starter, I found one for pancakes. Simple enough! Holy moly smokes!!! That's Ellie's term. HA HA. The texture of these pancakes is amazing. They don't fall! They stay fluffy and puffy. As long as I have sourdough starter in my house, I won't be making pancakes without it anymore. Let me know how yours turn out. What are your favorite pancake toppings? Did you try the little freezer PBJ sandwiches? Download the Recipe >> Sourdough Oat Pancakes
Ingredients Dry Ingredients 1 cup oats, blended into flour 1 cup all-purpose flour, unbleached 2 teaspoons baking powder 1 teaspoon baking soda 1 teaspoon salt Dry Ingredients 2 tablespoons granulated sugar 1 cup sourdough starter (or discard) 1 ½ cups milk 1 large egg 2 tablespoons canola oil Preparation
Tips
We are celebrating International Pancake Day with a yummy pancake brunch. With these yummy and simple to follow recipes you can too… Well, you can enjoy pancakes anytime of the day – because what’s better than breakfast for dinner? Amirite? 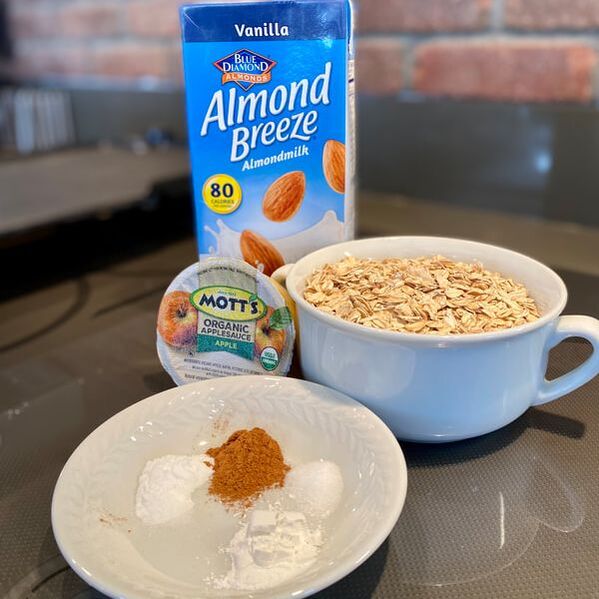 Oatmeal Blender PancakesIngredients 2 heaping cups of rolled oats 1 applesauce cup (3.9 oz.) 2 eggs 1 cup vanilla almond milk 1 tsp baking powder ½ tsp baking soda ¼ tsp salt ½ tsp cinnamon Instructions
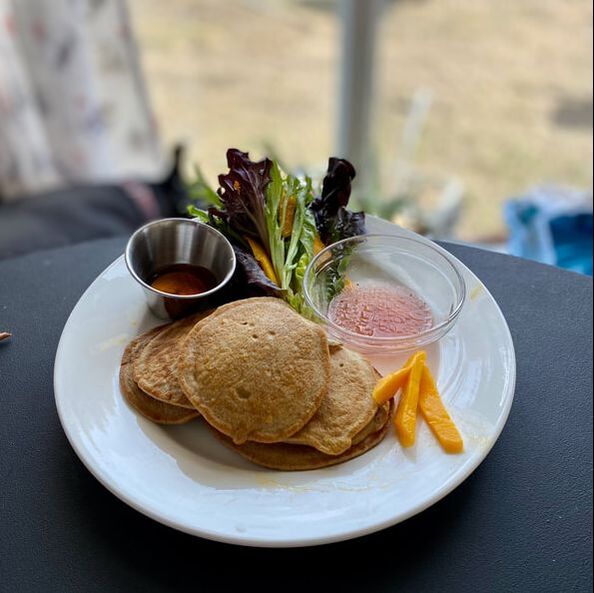 We served our pancakes with an easy mango salad and raspberry vinaigrette. Simply wash your greens, cut your mango, and bunch together (if you’re dipping it like us... True story - Kids love to dipping stuff). Want to make your Pancakes FUN? Check out our favorite book, OMG Pancakes, and these bottles for your batter! 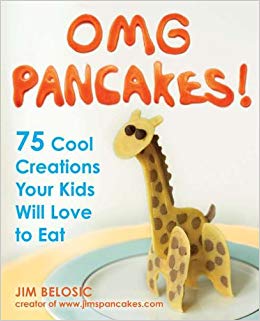 P.S. Check out Real Mom Nutrition for a yummy Homemade Instant Pancake Mix for a shelf stable recipe that’s ready to go when you need a quick pancake fix!
It's "Love Your Pet" Day starring Paco, Lola, and Sophie too!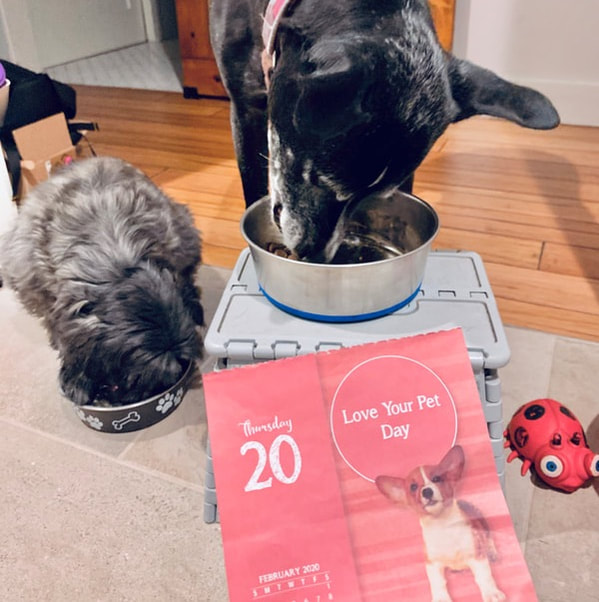 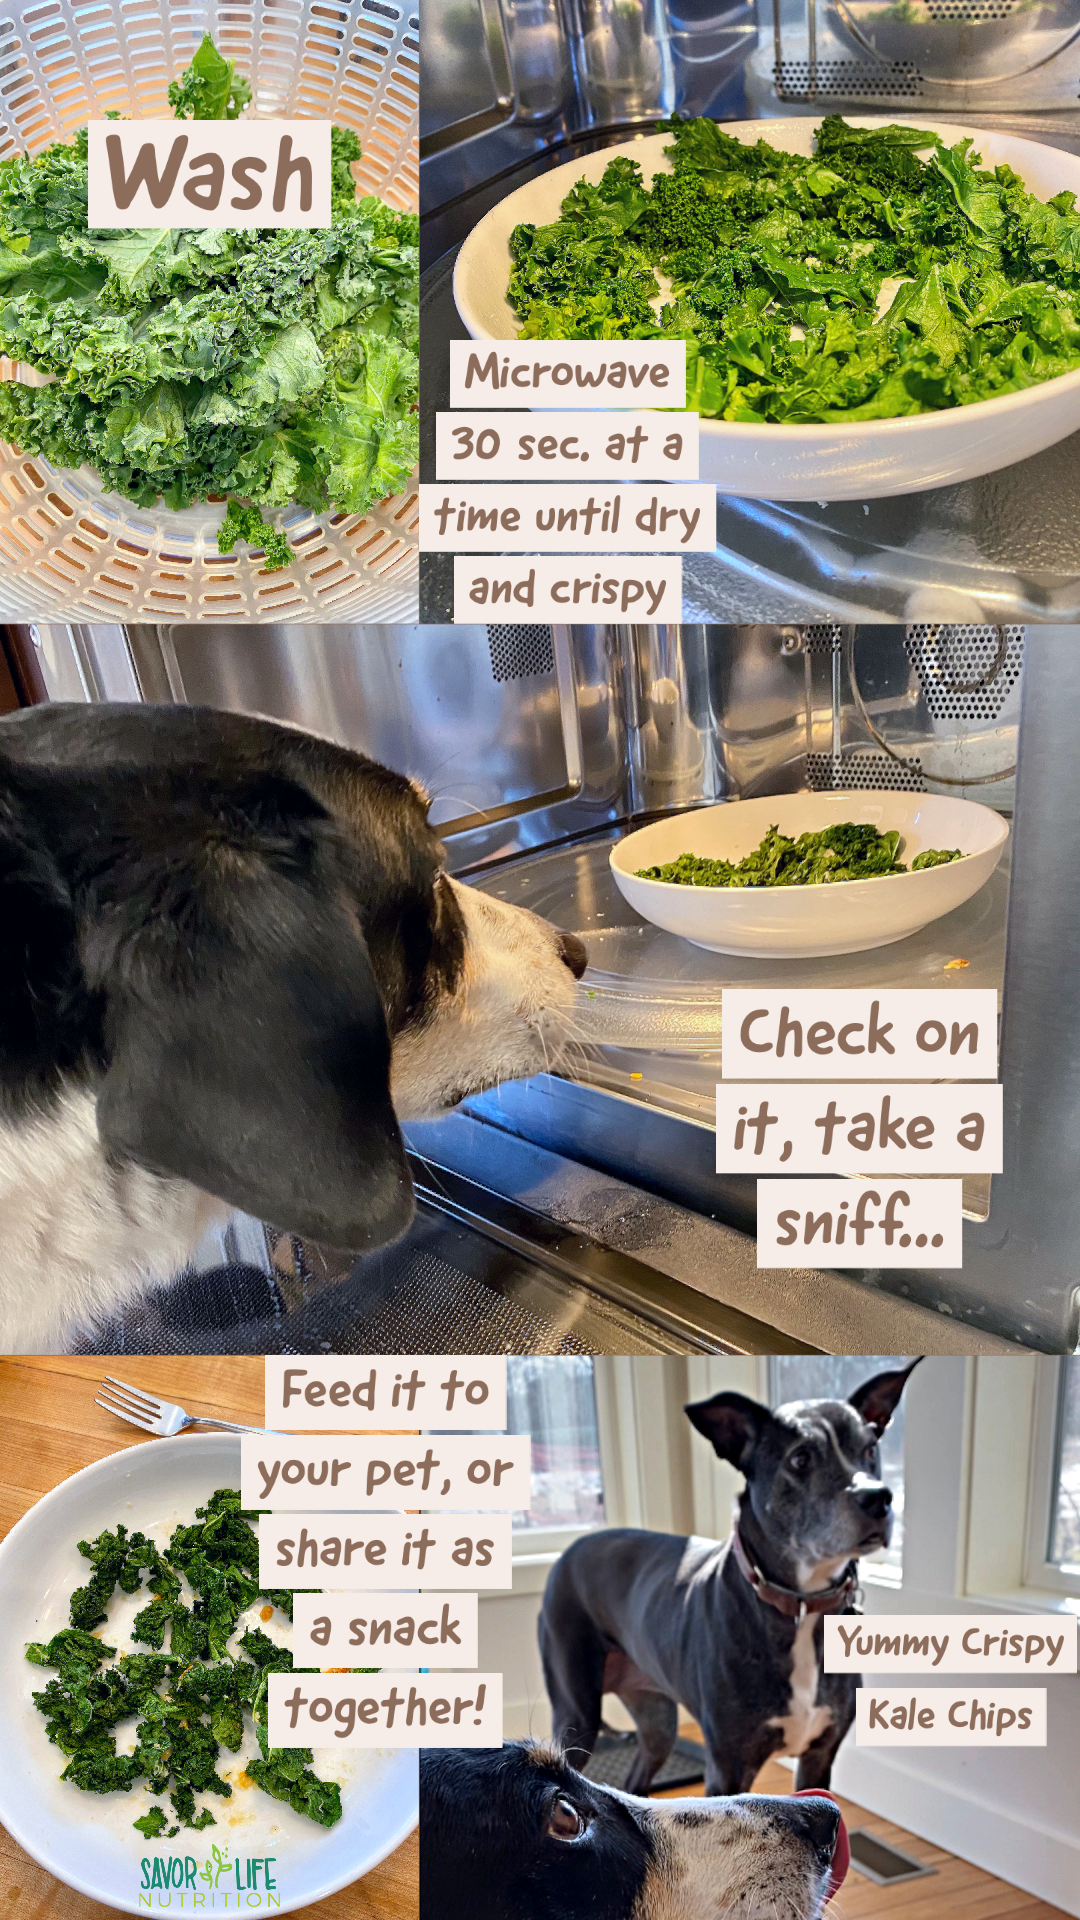 Kale Chip Dog Treats Ingredients 1 handful of kale, stem removed Parmesan cheese, the kind with the green lid (optional ingredient) Directions
That's it!!! According to some experts, many dogs do not tolerate dairy foods (our recipe features a tiny bit of parmesan cheese). Many dogs do tolerate a very small amount of cheese or yogurt likely due to the lower lactose content compared to other dairy foods. Our dogs love it and have not shown any signs of intolerance. If you're unsure, just check with your vet first before feeding your dog dairy products. What does your dog think??? Our dogs love it! Make sure to never feed your dog foods that are poisonous or will make your dog ill. If your dog ever eats something it shouldn't, make sure you call your vet immediately. If you cannot reach your vet, you can call poison control. We love our pets and we're sure you love yours too. Please, do your pet a favor and make yourself familiar with these lists of common foods, meds, and other substances that are toxic to dogs. Your furry friend will thank you. 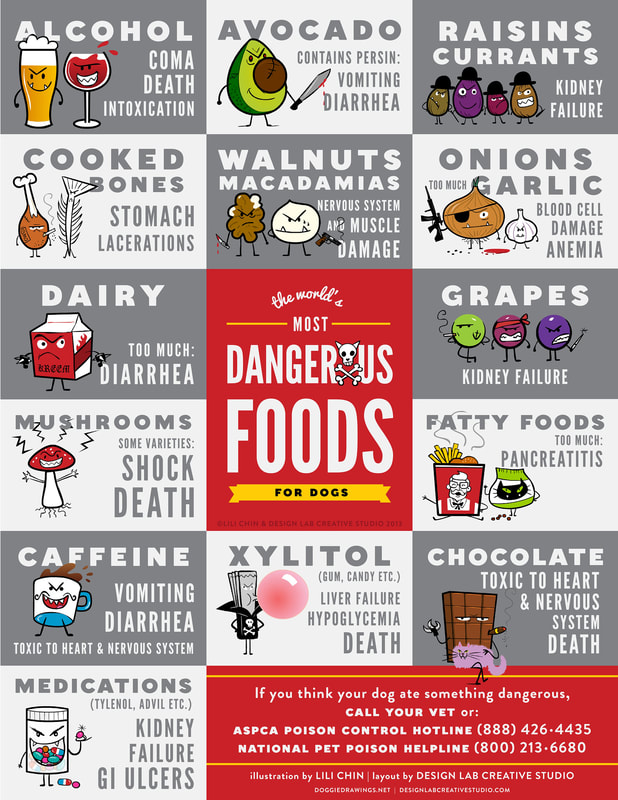 I needed a good reason to recycle this blog post. It's one of my winter go-to recipes. Let's celebrate "Drink Wine Day" by pairing wine with African Rice (or quinoa) and Peanut Stew. If you search the Internet you'll no doubt find a handful of recipes for this dish, all varying a little bit but all high in fiber, filling ingredents, and warm spices. This is my version of the well-known dish. 
This meatless stew is high in fiber and phytonutrients from all the different plant-based ingredients! It's super filling, loaded with flavor and it even freezes well so you can make it once and enjoy it for several meals. Blend It! Push It! Sip It! This stew can be blended for a drinkable soup or for bolus tube feeding. I love that our whole family can enjoy the same meal together. Download the Cooking For Tubies on Kindle for more blenderized tube feeding recipes! Consulting our trusty wine guide - Wine Folly According to the fancy diagram in Wine Folly: The Essiential Guide to Wine, a Rosé or Medium Red wine would pair best with African Rice and Peanut Stew. That is, if we even read it right. To be straight, I'm a dietitian and not a sommolier. I've gone wine tasting once and took a wine pairing class once. It was loads of fun and really interesting but I'm just not that fancy. You can drink any wine you want, really, with whatever you want however I do recommend staying at or below the recommended level of alcohol for adult males or females.   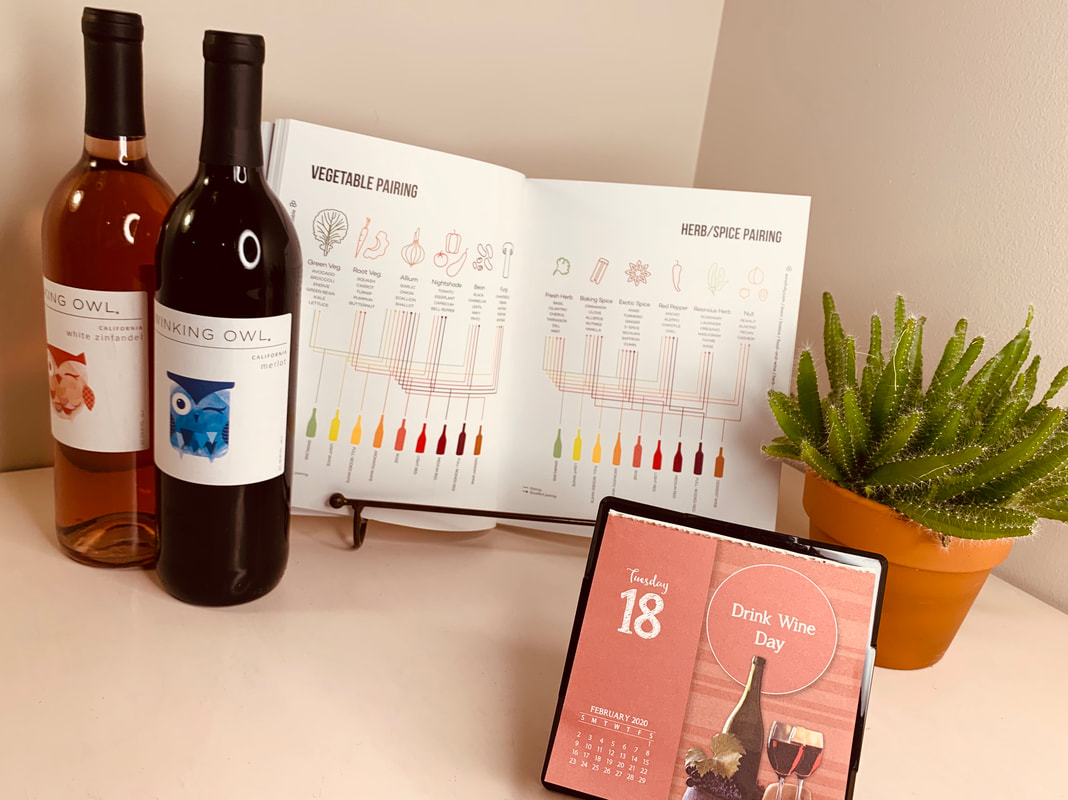 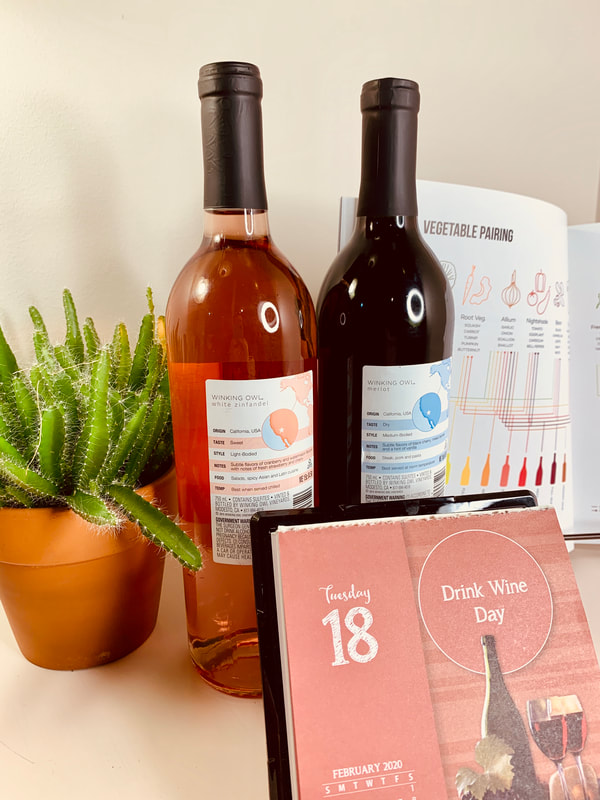 We don't drink much alcohol in our house but I do like to keep around a variety of wines. You never know when a recipe might call for a wine reduction or a splash in some pasta sauce to enhance other flavors of the dish. My go-to wine to keep on hand is Winking Owl wines from Aldi. They are CHEAP and delicious. Well, I only really like sweet wine but sweet wines don't work well in some dishes so if I'm cooking with it, it's not always gonna be a sweet wine. When you venture out to get your groceries, grab some Winking Owl Merlot or White Zinfindel from Aldi or if you're a big spender unlike me, pick out whatever tickles your fancy. For all the people out there who are either too busy, tired, or terrified of all the germs lurking in public spaces during cold & flu season there's Shipt. Shipt is an amazing and affordable personal grocery shopping service. Saying that "I LOVE SHIPT" is an understatement. It saves me so much time and reduces my chances of contracting contaigens that put my medically fragile child at risk. Follow my affiliate link to save $50 on a Shipt membership and I'll get $50 too! --> Share the love and save $50 RECIPE Spicy Vegetarian Quinoa and Peanut Stew 1-3 tbsp. Canola or olive oil 1 large sweet onion, diced 1 large sweet potato, diced 2-4 cloves of garlic, minced 2 tsp. thyme 1 tsp. cumin 4 cups chicken or veggie broth 1-2 cups cooked quinoa (you can use cooked brown rice instead if you'd like) 2 14-oz cans Mexican style diced, crushed or stewed tomatoes 1 14-oz cans garbanzo beans, drained and rinsed 3 medium zucchini, cut into ¼ inch pieces ½ cup of chunky or creamy peanut butter *cilantro *greek yogurt
Did you make it? Do you plan to make it? Do you also love Shipt? Will you blend it? Please comment below, pin the recipe, and share with your friends! Small businesses like mine rely on our fans and follwers to stay in business! Really though, I need your support to keep doing the work I love and that I'm so passionate about. Happy Cooking! Savor it! ~ Courtney This blog post contains affiliate links. As an Amazon Associate I earn from qualifying purchases from these links. All recommendations and opinions are my own. Guest post, Tammy Barnes Guys, after years of working hard to further my career and having two children, a house to maintain, and a partner to support, I was utterly exhausted. More and more, I was watching my windows of time diminish, and taking care of myself became a thing of the past. Trapped between this sense of guilt for not doing more at work and a sense of not doing enough at home to make life a little less crazy for all of us, I felt stuck, helpless, and, frankly, sad. On top of all of that, I had recently been diagnosed with ADHD. I have a husband with ADHD, and thus, statistically one of our girls will likely have it. I needed to provide a foundation to give the additional support and attention for our kids to thrive. In essence, I needed time. I needed a way to save my time without spending a prohibitive amount of money to make that happen. Enter Meal Preppers. After hours of searching for meal planning/grocery shopping/cooking healthfully when overwhelmed with life, I became… well, overwhelmed. I decided to do what so many of us finally do: ask Facebook! Fortuitously through that search, I met Courtney Stinson and Rachel Dreher, two hard-working women who really figured out a life hack in a major way. Courtney had started this business called Savor Life Nutrition, which combined her skills as a registered dietitian with her vast experience in providing gastric tube feeding support to her daughter. One of her projects in development was a service called Meal Preppers. So because so much of our life is about lists now, I am going to give y’all (I am originally from Kentucky) a list of why I was excited about this service:
In sum, my experience with Meal Preppers was not only a great one, but one that I found personally inspiring. I am extremely excited to join the movement to build a sense of community through food. I plan to use the service again (and again and again…), and I definitely will plan to host one at my home. In pajamas. Please, Courtney? Inaugural home Meal Preppers Party???  A picture of my amazing family at Chelsea Treehouse. Because you know, more time to hang with family. Thanks, Meal Preppers! This new blend is packed full of awesome ‘heart healthy’ ingredients!! Learn more about five of the beneficial ingredients in this recipe, and how they contribute to a happy, healthy heart! Don't forget to watch the video too! 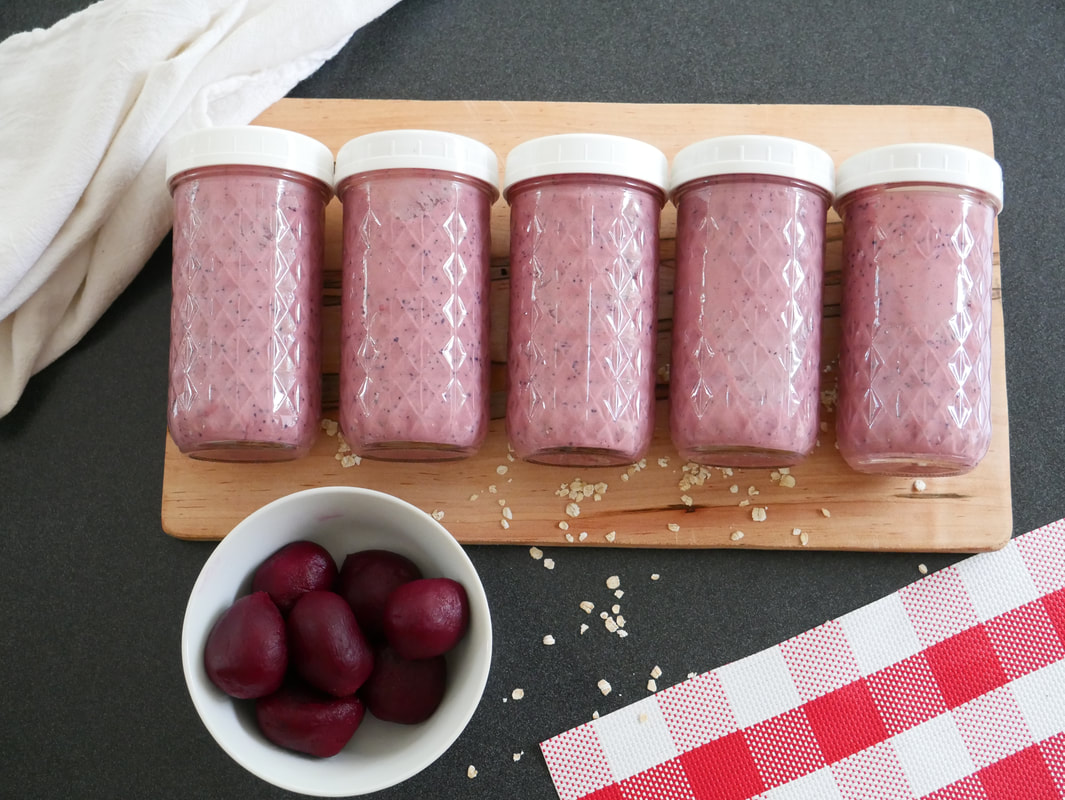  Did you know there is an invisible and scentless enemy ready to strike? His name is Bac (bacteria) and he can make you and your family sick. You may also be surprised to hear Bac and his friends have already invaded your hands, food, kitchen, and utensils. But do not worry! He can be conquered if you don’t take any whisks (risks) if you fight Bac by following the core 4 practices of food handling. Clean Wash your hands. Thoroughly wash your hands with warm soapy water for at least 20 seconds before and after handling food. It is important to take extra care to washing your hands immediately after handling raw meat. Wash your utensils & work surface. Before starting food preparation sanitize your countertop and ensure all your cutting boards, knives, blender, and other food preparation utensils have been washed and dried. * Check your blender's manual for cleaning instructions. Improper care can cause the seals to deteriorate and harbor bacteria. * Re-clean all surfaces in between different food types, especially when using raw meat. Wash fruits and vegetables. Even if you plan on peeling or cooking them! It’s important to wash produce with an inedible skin like melons, avocados, and oranges because when you cut them open, the knife can transfer bacteria from the outside to the part we eat. Separate Cross-contamination is how bacteria spreads. improper handling of raw meat, poultry, seafood, and eggs allows Bac and his friends to spread all over your kitchen. Keep raw foods separate. Keeping raw meat, eggs, and vegetables separate is essential in preventing cross-contamination. Use color coded cutting boards. Using one cutting board for fresh produce and a different cutting board for raw meat. To aid in preventing cross-contamination have a designated color for each category, like green for produce and red for meat. Don't reuse surfaces or utensils. Never place cooked food (or food that does not require cooking) on the same surface raw food was once on or use a utensils for cooked food that was used on raw food, unless you thoroughly wash it with warm soapy water first. Need more information? Check out the Get it Straight – it’s Safer to Separate guide by the Partnership for Food Safety Education. Cook Cooking food thoroughly. Cooking food until it reaches the proper internal temperature kills the bacteria responsible for causing food borne illnesses. Best way to fight Bac. Use a food thermometer to determine your food has reached the proper internal temperature, insert the thermometer into the thickest portion of your cut of meat. Poultry. Cook turkey, chicken, and duck to an internal temperature of 165°F. Ground Meats. Cook ground beef, pork, and lamb to an internal temperature of 160°F. Meat and fish. Cook beef, pork, lamb, and fish to an internal temperature of 145°F. Eggs. Cook eggs to an internal temperature of 160°F. Leftovers. Bring sauces, soups and gravy to a boil when reheating. Heat all other leftovers until they reach 165°F. Chill 40° or Below. Keep your refrigerator at 40° or colder. Temperatures of 40° or below will slow down the growth of harmful bacteria, which grow QUICKLY in temperatures above 40°.
2-hour Rule. It is important to refrigerate or freeze perishable foods within 2 hours of purchase, use, or preperation. Traveling Cold. The 2-hour rule applies to traveling too. ALWAYS use ice packs and a cooler. Pro tip - a full cooler will keep food colder than a partially empty one. Thaw Safely. Never thaw foods at room temperature, always thaw and cool foods in the fridge, under cold water, or in the microwave. Throw it out. Even in the fridge, food can harbor bacteria. Always follow the reheating guidelines and throw out food spoiled food. The Storage Times Guide will help you determine safe time limits for home refrigerated foods. This recipe is a new favorite in our household. I'm normally not a fan of hiding vegetables, but my little guy loves mac-n-cheese so much that when he has mac-n-cheese anything else on his plate will go untouched, even cookies! So I decided to take the plunge and throw everything into the sauce. But don't be fooled, just because you can't see them, doesn't mean you can't taste them, and they are yummy. When looking at other "hidden veggie" mac-n-cheese recipes I found they all had no seasoning, cooking for toddlers does not mean something has to be bland - they like flavor too - which I made ours with all the seasonings I love mixing in with my cheese sauces. I hope you enjoy it as much as Daxton does! Ingredients 12 oz box *protein plus pasta 1 vegetable broth concentrate pouch 3/4 cups water 2 medium carrots, cut into 1 inch pieces 1 cup chopped cauliflower 1 cup frozen butternut squash 3/4 tsp salt 1/4 tsp pepper 1/4 tsp mustard powder 1/4 tsp minced garlic 1/4 tsp paprika 1/4 cup whole milk + 2 Tbs 1 1/4 cups shredded cheddar cheese 4oz cream cheese Directions
Notes: *I love using protein plus pasta because I feel like it stands up better to thicker sauces. Feel free to use your favorite pasta. **I use sodium free stock b/c you can always add salt to a dish, but you cannot remove it. Sodium free products allows me to control how much salt my family consumes. ***I used about 2/3s of the sauce on my pasta and saved the rest for cheesy veggies and chicken we had the next day. When mixing the pasta and the sauce a little at a time until it reaches the desired cheesy'ness. Fun Mix-ins to complete your meal: When I do mix-ins I usually make the sauce less thick so it's more of a casserole consistency. Broccoli & Pre-cubed ham: Chop up and steam 1 head of broccoli. Heat up small package of cubed ham in skillet until caramelize. Mix in to pasta. Rotisserie Chicken & Peas: Shred up 1/2 chicken and mix into pasta with 1 cup steamed peas. Happy cooking! ~ Rachel Dreher & Daxton
 Using my Blendtec Blender: 1. cook/prepare ingredients (cook pasta or oatmeal, steam veggies etc.) 2. Add liquid to the blender. 3. Add soft foods like avocado or yogurt. 4. Add other ingredients. 5. DO NOT OVERFILL BLENDER. ONLY FILL TO TOP MEASUREMENT LINE. 6. Blend on WHOLE JUICE setting for one cycle. 7. Blend on SMOOTHIE setting for one cycle. 8. Let blend settle for 10 minutes. 9. Divide among straight sided mason jars and put on plastic storage jar lid. 10. Refrigerate 1 days worth of food and freeze the rest. To heat refrigerated blend: 1. Remove lid. 2. Microwave on half power for 1 minute. 3. Replace cap and shake vigorously. 4. Remove cap and microwave for one more minute on half power. 5. Replace cap and shake vigorously. 6. Add additional liquid if needed to thin. 7. ALWAYS test temperature BEFORE feeding to prevent burns! To thaw: 1. take food from freezer and place in fridge before bed (to be used for breakfast) (If I forget to thaw in fridge, I use the defrost button on the microwave and defrost for 5 minutes) 2. Place previously frozen jar in microwave on defrost for about 3 minutes. 3. Shake vigorously. I very rarely need to re-blend foods using this method. On occasion we'll have to re-blend because maybe a fiberous food wasn't soft enough before blending. Some foods just require more added liquid. Some blends will need to blend longer depending on the crunchiness and toughness of the foods like nuts for example. Microwave times will vary depending on how cold/frozen your blend is and the power of your microwave. Always test the temperature of the food before serving heated food to children, loved ones, or patients!!! Looking for recipe ideas? Try these:
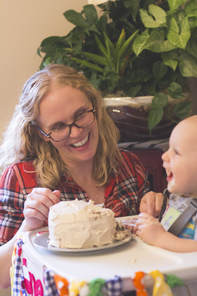
We're ExpandingRachel Dreher has come on board to manage the business operations so Courtney has time to see more patients and clients. Rachel is a busy mom of a super active toddler named Daxton (the cute kid to the left). She's always excited to share her creative tricks of "how to mom" and her toddler feeding escapades. You'll start seeing posts by Rachel and probably some cute pictures of her adorable kiddo, Dax, here on the Lettuce Live Well blog very soon.
What's New?I, Courtney, have spent the last 3 years learning how to manage work and Life With Ellie. Raising a child with complex medical needs has shaped me and my career in ways I never would have forseen. I have taken my passion for food & nutrition and combined that with my experinence feeding Ellie to add blenderized tube feeding services to Savor Life Nutrition. I have also been learning how to manage mealtimes with my son, Nathan, who has ADHD and now takes medication which adds a whole new set of unique feeding challenges. I've learned to get creative in how I apply the Division of Responsibility at the table. Without the challenges my children have provided me, I wouldn't posess the knowledge or experience I have today. Funny how having children changes us in so many ways.
What's improved?
Deanna Denny, RDN will be in Chelsea, MI at Polly's Country Market this weekend sharing what she knows about simple crockpot cooking and how everyone can enjoy trick-or-treating, including those with food allergies. She'll have a surprise recipe and can answer any of your food and nutrition questions.
We're kicking off Wellness Weekends at Polly's Country Markets in Chelsea, Michigan. The events are sponsored by 5 Healthy Towns, Washtenaw County Department of Public Health, and Polly's Country Markets. Come see us for two weekends per month (occasionally the schedule may need to be adjusted but this is the goal) for nutrition tours, shopping advice by Registered Dietitian Nutritionists, samples, giveaways, games, and tips & tricks for getting delicious, nutritious food on your family's bellies.  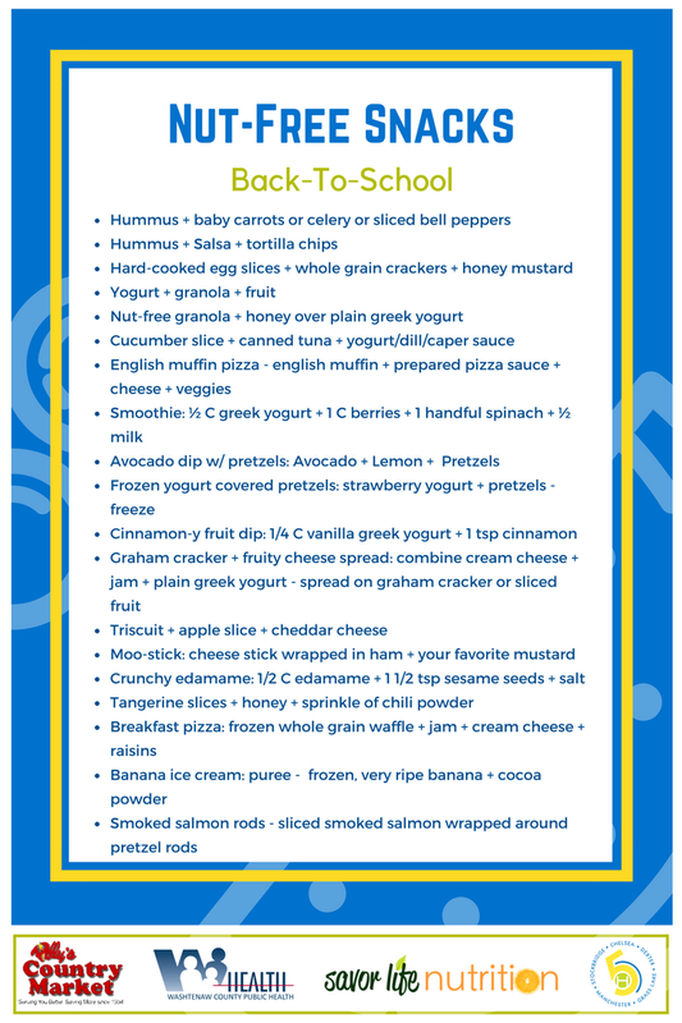 Back-To-School Snacks #NutFree #NoPB
5 Tips For Healthier Grilling, Hey, Look! I'm On TV Demonstrating A Great Herb Sauce Recipe6/21/2016
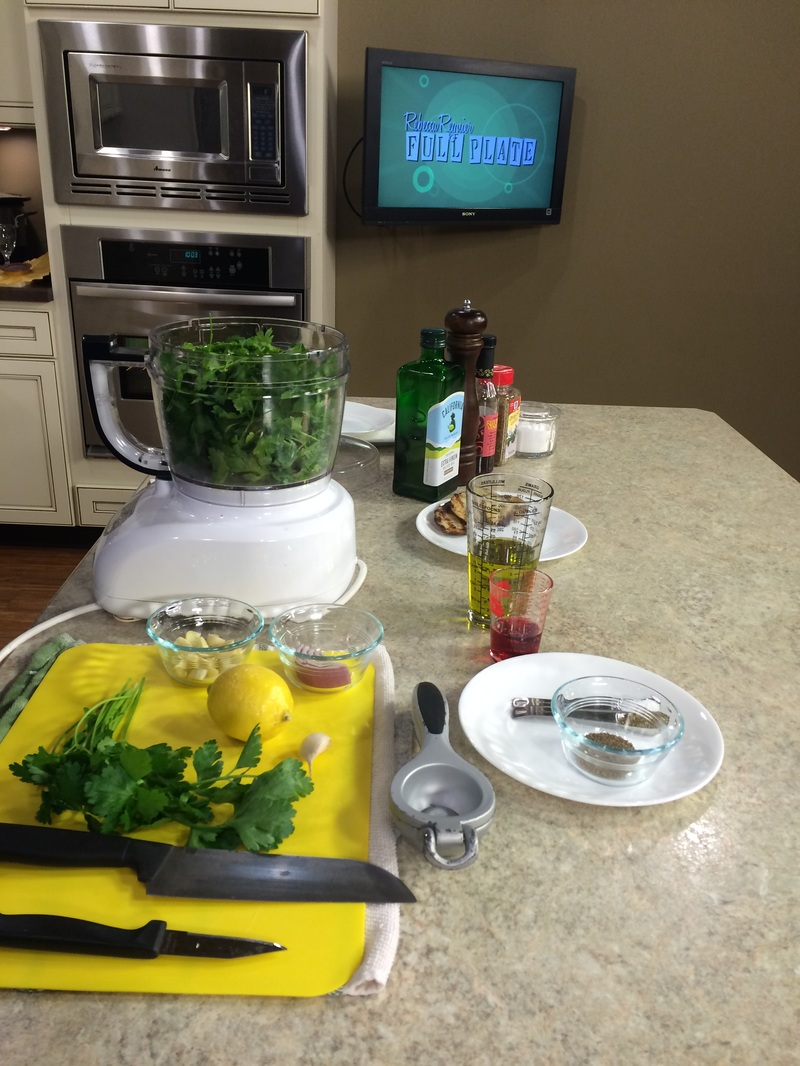
 For my second TV debut I polled dads on Facebook and asked "What meal do you want made especially for you on Father’s Day"? The answer was a unanimous "steak on the grill"!! There was of course some joking around because there seems to be this perceived notion that steak isn't "healthy". The thing is, if you buy the right cut and you prepare it in a way that prevents harmful substances and promotes eating more nutritious foods I think steak can be a great choice. 5 Tips For Healthier Grilling First, let's learn a little about why it's important to keep health in mind while grilling. Cancer-causing reactions happen forming PAHs (polycyclic aromatic hydrocarbons) when fat drippings hit the coals and the smoke sticks to your food. HCAs (heterocyclic amines) are the black or charring you see on your meat when you cook over high heat or if you have flare ups. It's important to know that this applies to all high heat cooking, not just outdoor grilling.
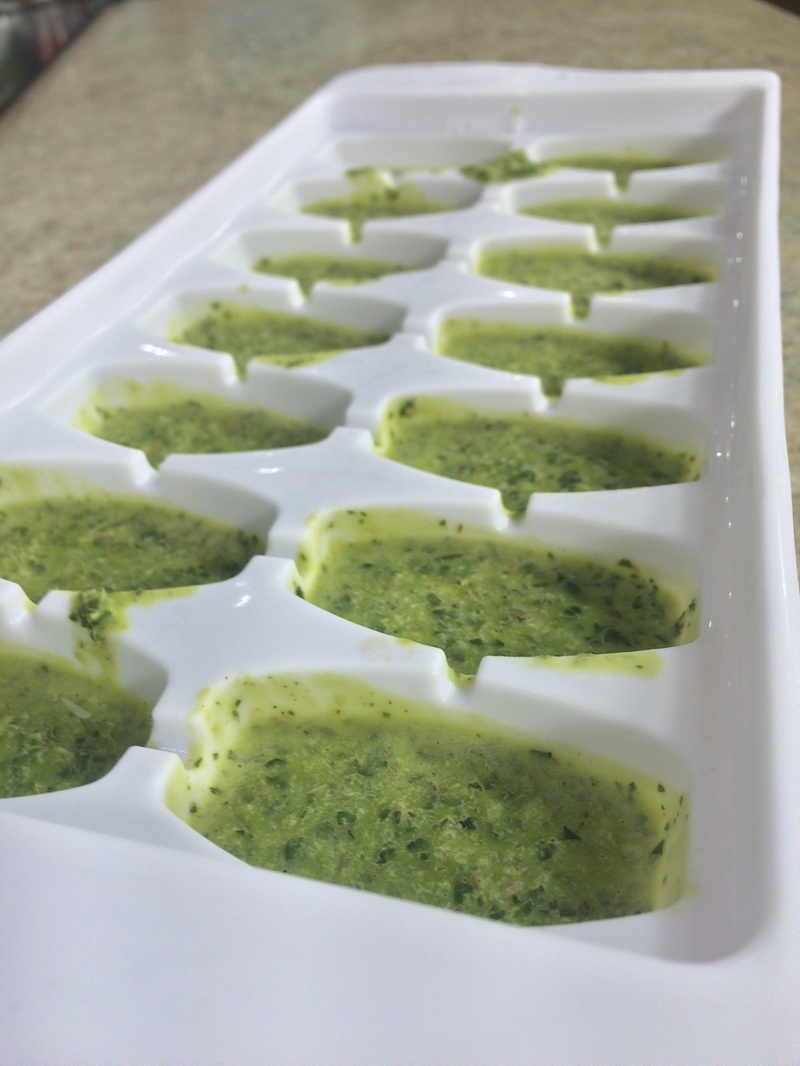
CHIMICHURRI Argentine Steak Sauce/Marinade Reserve half for marinating and half for sauce Watch here for a demonstration and a few extra tips INGREDIENTS 1 bunch flat leaf parsley, thick stems removed (sub half cilantro for variety) 3⁄4 cup olive oil (high heat oil such as canola oil if using as a marinade) 1⁄4 cup red wine vinegar 3 tablespoons fresh squeezed lemon juice 8 cloves garlic, minced 1 tablespoon diced red onion or shallot 1 teaspoon dried oregano or 2+ tablespoons fresh oregano 1 teaspoon freshly ground black pepper 1⁄2 teaspoon salt PREPARATION: Combine all ingredients in a food processor and pulse until combined. TIPS:
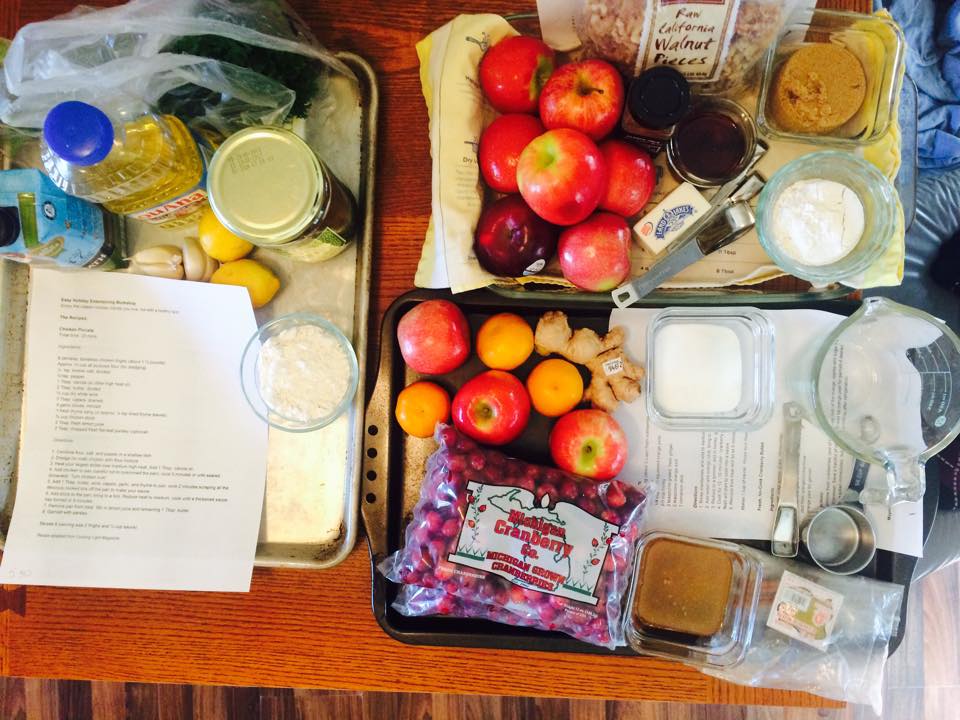
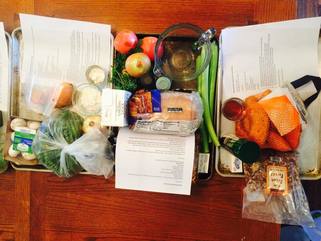
Written with special guest, Caitlin Cunningham, dietetic student, Eastern Michigan University We are excited to share with you our Easy Holiday Entertaining Cooking Demonstration! The holidays are a fun, stressful, busy, and often indulgent time of year. We want to show you how you can still enjoy your favorite classic dishes with a delicious, nutritious twist. While grocery shopping last night for these ingredients I was reminded of how many nutrient-void, processed, convenience foods make their way to the Thanksgiving dinner table. What also makes me sad is the fact that this is normal for the majority of Americans on a daily basis. Today, Caitlin and I have prepped some recipes to make some of your favorite holiday-inspired dishes from scratch with REAL food and nutritious ingredients. Just so you know, this doesn't mean we'll be cutting any corners when it comes to flavor. We both believe it's okay to enjoy a little extra butter, use white flour, and even some sugar when recreating indulgent holiday dishes. Stay tuned on Sunday, November 15th beginning at 1 P.M. as we demonstrate how to prepare easy and delicious holiday inspired dishes that you can share with your friends and family. We will be using Periscope and Google Hangouts to broadcast this cooking demonstration to you. See below for details on how to connect with us. We'll try our best to stick to the following schedule (EDT): 1:00 - Ginger Cinnamon Cranberry Sauce & Fresh No-Cook Cranberry Relish 2:00 - Maple Walnut Apple Crisp 3:00 - Mashed Sweet Potatoes with Praline Pecans 3:30 - Sage Dressing from Scratch (Stuffing) 4:30 - Homemade Green Bean Casserole Bonus - Chicken Piccata recipe attached too We want to help you lighten up holiday recipes by teaching you how to swap out excess fat, sugar, and salt in exchange for flavorful, fresh ingredients, spices, and seasonings. We hope you can join in! Additional tips to lighten up your favorites:
Periscope: @LettuceLiveWell & @Caitlin56772519 Twitter: @LettuceLiveWell & @CaitlinRD2B  Most people think of dark leafy greens as just a spring or summer food but did you know that greens such as spinach have a fall season here in MIchigan too? Join me and EMU dietetics student Nick Pomante in store to celebrate the nutritious, delicious bounty of fall. Learn new ways to eat spinach (and how to benefit from it’s rich nutrient profile even if it’s not one of your favorite foods) with our Enjoying Autumn Greens cooking demonstration followed immediately by the ever-popular Label Reading 101 event!
When: Monday, October 20th Event start times of 10AM, Noon, & 2PM Where: Polly’s Country Market, Chelsea, MI Nick and I will be on-site from 10AM until 3PM to show you new ways to use one of the most versatile items in your fridge, spinach. Spinach has a mild flavor and versatile texture which makes it great for adding to your favorite dishes for an extra boost of nutrition and color. Discover the many health benefits and new ways prepare this versatile veggie to satisfy your taste buds and your body. In collaboration with the Chelsea Wellness Coalition, we will be offering a 1-hour hands-on class teaching label reading at Polly's Country Market. We know nutrition facts can be confusing and daunting. We’ll help you understand what all the jargon really means and help you make informed choices when you shop for groceries. Nick and I will lead you through the store and teach you to evaluate foods based on whether or not the food can improve your overall health. You’ll also learn how to recognize not-so-healthful ingredients and how to get the most bang for your buck. We hope to see you there! Happy eating! Seriously, nothing will taste better than this on a hot sunny day after an intense workout or digging in the garden. This blended drink is super refreshing. If you prefer, you can serve it "on the rocks" instead of blended. Just blend all ingredients except for the ice and serve the juice mixture over the ice. Not only is this drink delicious, it's super nutritious too. Ginger is an amazing anti-inflammatory and can soothe an upset tummy. Citrus fruits like oranges and lemons are vitamin C superheros assisting in iron absorption and acting as antioxidants fighting cancer-causing free radicals. Dates are rich in fiber, polyphenols, and have a natural balance of minerals which may help in decreasing blood pressure. BONUS: There are ZERO added refined sugars in this recipe. All the sweetness comes from the fruit. You can't get better than that folks! Let me know how you like it! And, don't forget to pin it for later. Eat deliciously, live nutritiously! ~ Courtney 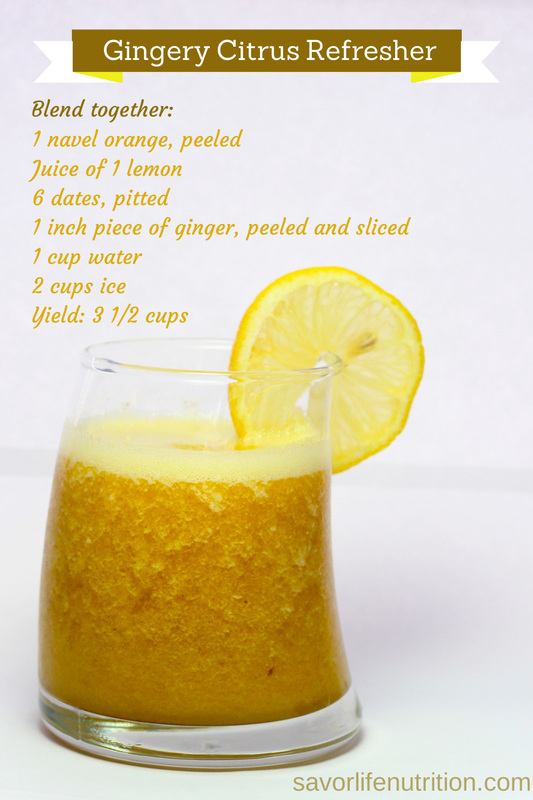 Gingery Citrus Refresher - Savor Life Nutrition & Wellness - Courtney Stinson, RDN  Finally I've come up with the words to describe how I feel about the conflicting viewpoints on farming and agriculture and how they solve the food problems of the world.
1. Add vodka to your dishwasher instead of your glass. Here is why. If you look at the calorie breakdown of where we get our energy you'll see that alcohol can definitely impact your weight. I don't know about you, but I'd rather get my calories from solid food instead of liquids. Food makes you feel more satisfied than liquid when restricting calories during weight loss. Carbohydrate (carbs) 4 kcal/gram Protein 4 kcal/gram Alcohol 7 kcal/gram Fat 9 kcal/gram So why put vodka in the dishwasher? Well, to replace the expensive, mystery chemicals that you are currently using as rinse agent in your dishwasher. About 2 years ago I became irritated enough with cleaning product companies not putting ingredients lists on their labels that I did my own research and concocted my own solution. I wanted the last thing that touches my dishes to be something edible just in case there are traces of it left on my dinnerware. Vodka is a mild surfactant which means it creates a sheeting action to help the water off the surface of the dishes. You can find vodka very cheap and we know that it is edible however it isn't something I recommend consuming on purpose. If you need a drink, try a glass of wine... one glass. More on surfactants here. Besides the surfactant, rinse agents typically also have ingredients to remove mineral buildup and limescale. Vinegar is known to do this very well and is also a food grade ingredient. Add a little to your dishwasher and then make a vinaigrette. More on the chemistry of vinegar here. *Disclaimer: I've been using this solution for approximately 2 years in my dishwasher with great results however, I have not spoken with dishwasher manufacturers to make sure this solution is safe for dishwashers. I will not be responsible for any dishwasher malfunctions etc. if you decide to try this recipe. 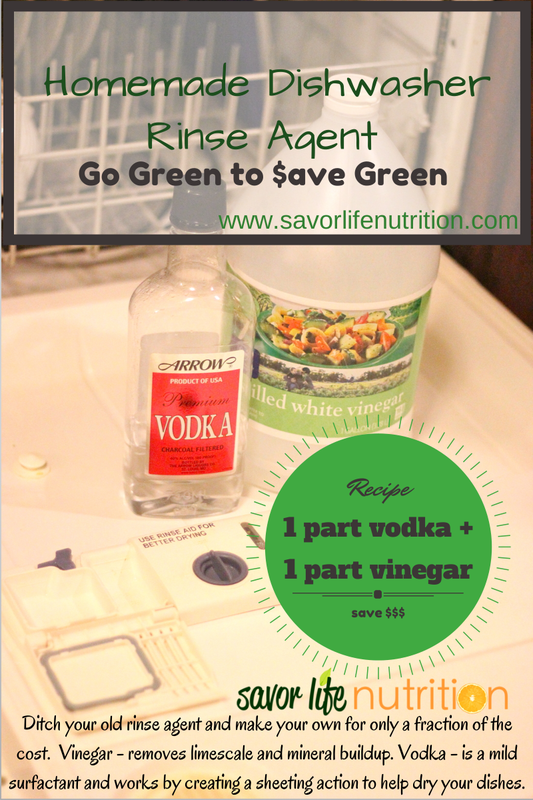 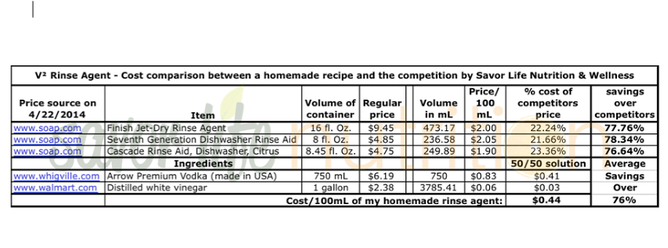 2. Eat Outside The Box This one seems simple but can be the most difficult to maintain with a busy lifestyle. Eating less boxed or packaged foods often means more food prep, meal assembly, and cooking. It also means less garbage (and recycling if you recycle) leaving your home for the landfill each week. Eating less packaged foods will likely buy you a healthier diet by naturally decreasing the amount of food additives, preservatives, trans fat, and sodium you consume in a day. I'd recommend shopping for, preparing, and eating:
More reasons to avoid packaged food... to avoid all the marketing shenanigans. If you're eating fresh, whole foods you're less likely to need to decipher confusing health claims too. There are some interesting studies being done in this area like this one from Brian Wansink and his team at the Food and Brand Lab at Cornell University.  3. Consume Less & Move More In order to lose weight or to maintain a healthy weight you've got to eat well and move often. You can lose weight by dieting and you can lose weight by exercising. I recommend a combination of both for optimal health benefits. It's often easier for people to change the quality of food they eat rather than the quantity for many reasons. If you want to learn more, read the book Mindless Eating by Brian Wansink and/or find a qualified dietitian/nutritionist to help you.
Consuming less food = less waist. Consuming less stuff/food = less waste. Many people drive places when they could easily walk or bike. It's easier to make the decision to walk to your destination if you think of that time you spend walking as exercise and a happy pill instead of lost time. Exercise makes us feel good by releasing hormones that improve mood. Exercise also makes us stronger and healthier. People who are more physically active score higher on the scale for quality of life. Move more = less waist. Move more = consuming less (gas to power your car etc.) So there you have it. 3 tips to help you reduce your waste and shrink your waste all at the same time! 1. Add vodka to your dishwasher instead of your glass. 2. Eat Outside The Box 3. Consume Less & Move More Happy Earth Day! (a few minutes late)
 Quick canned veg salad Quick canned veg salad I've been extra busy today and needed a really quick lunch for me and my 2-yr-old. I didn't have time to cook or prep any fresh produce. We also didn't have any leftovers to reheat. Thankfully, I keep a variety of healthy canned ingredients in my cupboard for days like today.
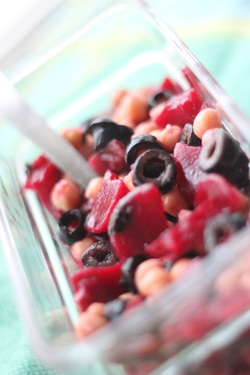
I was inspired to make something with marinated artichokes because they came in their own "dressing". From there I looked to see what else would taste good with Italian flavors and would be visually appealing. I love when a really good recipe comes from having to scrounge the cupboards or fridge for scraps! Here is what I found: Canned, sliced, black olives Marinated artichokes (missing from photo) Beets, in water, no salt added Chickpeas, organic I almost always buy organic canned beans because they are usually lower, sometimes more than half as much, in sodium. Organic canned beans usually don't have unnecessary additives either and as a bonus, they're organic too. National Nutrition Month® is coming to an end but that doesn't mean we should stop celebrating with delicious, nutritious foods. I hope this recipe has proved to you that good nutrition can come from a can. You don't have to slave over a hot stove for hours to come up with something you feel really good about feeding your family! Recipe: 1 small can sliced black olives, rinsed and drained 1 jar marinated artichokes, chopped 1 can beets, in water, no salt added, drained and chopped 1 can chickpeas or garbanzo beans, preferably organic, drained Directions: Combine all ingredients and serve immediately or refrigerate and let flavors mingle a little longer before serving. Disclaimer: No toddlers were harmed in the feeding of this recipe. I promise he enjoyed every bit of it and even served himself a second helping. P.S. I don't write about the foods my toddler eats to brag, but to show that, when offered (never forced) a variety of foods on a regular basis, kids enjoy eating all sorts of foods typically thought of as not being "kid friendly". 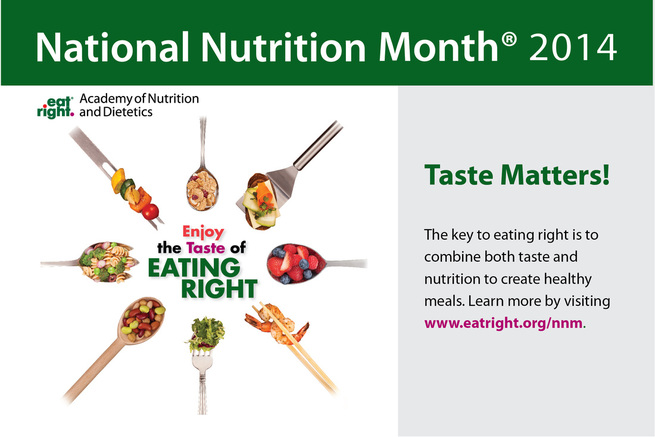 Taste Matters! I don't know anyone who enjoys or is willing to eat food they dislike on a regular basis. However, I know that many foods that people think they don't like may become more accessible to their taste buds if the offensive foods are paired with highly flavorful foods that are more enjoyable. March is National Nutrition Month® and the slogan is "Enjoy the Taste of Eating Right". This fits right along with my everyday mission which is teaching people to eat healthfully by eating the foods they enjoy and avoiding foods with the flavor palate and texture of cardboard at all costs!
Tonight for dinner I concocted some sort of skillet meal or casserole style dish that was mighty good. My fridge is getting bare and I had a limited variety of items to work with. I had some chorizo in my fridge which I had planned to use for a different recipe but then changed my mind and didn't make it. So, I needed a way to make a healthy meal around my chorizo. The chorizo by the way was from Polly's Country Market in Chelsea, MI. I'm so happy to have access to freshly ground sausage which happens to be made right in the store. Thanks Polly's CM! My husband "doesn't like" onion or kale or spaghetti squash but these happened to be the other items that needed using up this week. Plus, they are all highly nutritious and he needs to eat his veggies anyway! Even though my husband isn't a fan of these foods, I know if I mix them with strong flavors he really likes that he'll eat them anyway without complaint. Our meal tonight was rich in vegetables of different colors, quinoa which is very nutritious and high in fiber and some protein from the chorizo. I don't mind that chorizo tends to be relatively high in saturated fat because the rest of our foods have virtually no fat in them. I also believe meat should be more of a side dish as it is in this recipe than a main dish. There wasn't much leftover and my 2 year old asked for seconds. I hope you enjoy this recipe as much as we did! Chorizo veggie skillet/casserole Yield: approx. 8 servings Ingredients: 1 spaghetti squash 1 cup uncooked quinoa 1 whole bunch of kale, chopped, remove and discard stems 1 onion, diced 1 lb chorizo (bulk sausage, remove from casing if in links) Salsa (I highly recommend this recipe: http://www.mountainmamacooks.com/2012/01/quick-and-easy-blender-salsa/) Directions: 1. Cut spaghetti squash in half and roast cut side down in 350 degree oven until soft, approx. 30 minutes. 2. Cook quinoa according to directions, 1 cup quinoa to 2 cups water. 3. Brown the chorizo over medium-high heat. Drain on paper towels and set aside. 4. Add diced onion and chopped kale (a little olive oil if needed) to skillet and saute over medium heat until cooked (onions will appear translucent). 5. Add cooked squash (use spoon to scrape out of shell), quinoa, and sausage back to the pan with onion and kale. Mix together to create casserole and serve with your favorite salsa! Add a side of your favorite fresh fruit and you've got one heck of a meal! 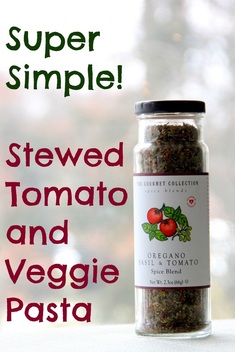 Lunch needed to be quick today and my refrigerator is getting bare. I really need to go grocery shopping! Anyway, I quickly threw a really easy pasta dish and it was so good there wasn't even any left to take a photo of. The recipe follows:
Ingredients 1 box rotini pasta (whole grain recommended) 1 – 28 oz can stewed tomatoes 2 carrots, grated ½ sweet onion, diced 1 – 4 oz can sliced mushrooms 1 – 2.25 oz can sliced black olives 3 handfulls fresh baby spinach, chopped 2 T. olive oil ¼ t. salt 1 T. Oregano Basil & Tomato Spice Blend (such as The Gourmet Collection’s) Directions 1. Saute onion and carrot in olive oil, add salt. 2. When carrots are soft, after approximately 5 minutes, add tomatoes, mushrooms, olives and spice blend. Cook covered over medium-low heat. 3. Cook pasta according to package directions. 4. When pasta is finished, remove sauce from heat and stir in spinach. 5. Serve pasta with generous helping of tomato veggie sauce. |
Categories
All
Archives
July 2020
|
||||||||||||||||||||||||||